Looking for a delicious no sugar diabetic apple pie recipe? Look no further! In this article, we will share with you a mouthwatering recipe for a no sugar apple pie that is perfect for those managing diabetes in Australia.
The crust of this pie can be either homemade or store-bought, giving you the flexibility to choose the option that suits you best. You can even use an Oreo or graham cracker crust for a twist on the classic recipe.
The filling of this pie is made with sugar-free chocolate pudding, cornstarch, whole milk, egg yolks, vanilla, butter, and bittersweet chocolate. It is thickened to perfection with cornstarch and egg yolks, resulting in a creamy and indulgent filling that is completely free of added sugar.
To enhance the flavor and add some extra sweetness, you can top your pie with whipped cream, fresh raspberries or strawberries, hot fudge sauce, chopped pecans, or walnuts. The options are endless, allowing you to customize your pie to your liking.
After assembling the pie, it is important to chill it in the fridge for at least 4 hours before slicing and serving. This allows the filling to set and ensures that you get perfect slices every time.
This recipe yields 10 servings and has a total preparation time of 4 hours and 10 minutes. It is a wonderful dessert option for those managing diabetes, as it satisfies your sweet tooth without compromising on taste or health.
Key Takeaways:
- This no sugar diabetic apple pie recipe is suitable for those managing diabetes in Australia.
- The crust can be homemade or store-bought, giving you options to personalize your pie.
- The filling is made with sugar-free chocolate pudding and bittersweet chocolate, providing a delicious and indulgent taste.
- You can top your pie with various options like whipped cream, fresh berries, hot fudge sauce, and chopped nuts.
- Remember to chill the pie in the fridge for at least 4 hours before serving for the best results.
- This recipe yields 10 servings and can be enjoyed by anyone looking for a delicious no sugar apple pie.
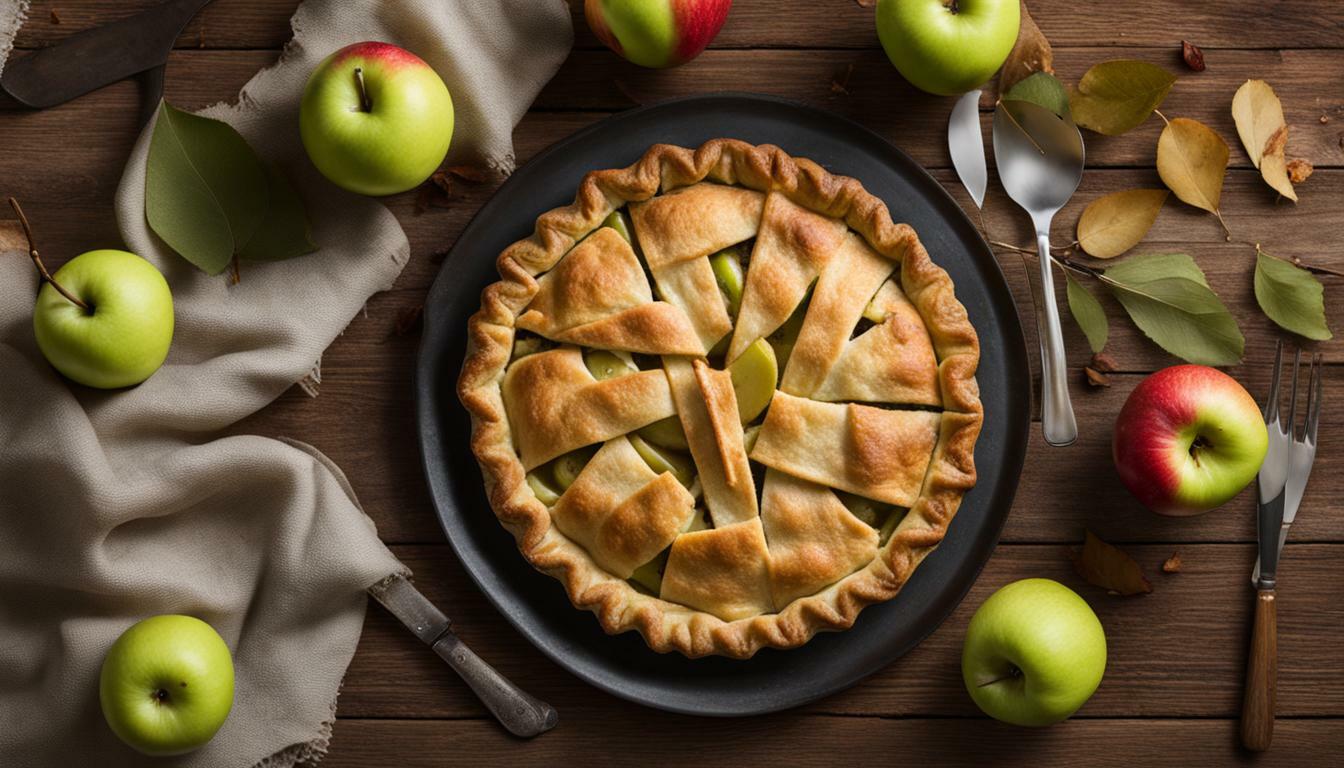
A Sweet Treat for Diabetics: No Sugar Added Apple Pie Recipe
Indulge in a guilt-free dessert with our sugar-free diabetic apple pie recipe, specially created for those managing diabetes. This delicious apple pie is made without any added sugar, allowing you to satisfy your sweet tooth without compromising your health. It’s the perfect treat for diabetics who want to enjoy a classic dessert without the worry of spiking blood sugar levels.
The crust of this apple pie can be made from scratch using a homemade recipe, or you can opt for a convenient store-bought crust. For a twist, you can even use an Oreo or graham cracker crust. The filling is the star of the show, made with sugar-free chocolate pudding, cornstarch, whole milk, egg yolks, vanilla, butter, and bittersweet chocolate. The combination of these ingredients creates a rich and creamy filling that is sure to satisfy your cravings.
Once the pie is assembled, you can add your favorite toppings to enhance the flavor even more. Whipped cream, fresh raspberries or strawberries, hot fudge sauce, and chopped pecans or walnuts are all great options. The pie needs to be chilled in the fridge for 4 hours before slicing and serving, allowing the flavors to meld together and creating a perfectly chilled dessert.
Additional Dessert Options for Diabetics
If you’re looking for more sweet options with less sugar, there are plenty of delicious alternatives available. Try exploring vegan desserts with no sugar added, like chocolate chip oat milk banana ice cream, mango basil sorbet, or strawberries and cream overnight oats. These desserts are not only healthy but also packed with flavor, making them a great choice for anyone watching their sugar intake.
For a refreshing and tropical treat, whip up a coconut-lime smoothie or indulge in a no-bake oatmeal peanut butter chocolate chip cookie. If you prefer warm and comforting desserts, try a slow cooker apple pie coconut oatmeal or a double-chocolate cherry chunk ice cream. The options are endless when it comes to satisfying your sweet tooth while managing your diabetes.
| Recipe Details | Time | Servings |
|---|---|---|
| Total Preparation Time | 4 hours and 10 minutes | |
| Chilling Time | 4 hours | |
| Yield | 10 servings |
Expand your dessert repertoire with different interpretations of cobbler, such as a blackberry cobbler recipe. This delectable dessert combines self-rising flour, sugar, butter, and blackberries. Baked in the oven until golden and bubbly, it’s a delightful way to enjoy the sweetness of fresh fruit. Serve it with a dollop of sweetened cream, a scoop of vanilla ice cream, or a swirl of whipped cream for the ultimate indulgence.
Options for Homemade or Store-Bought Crust
When it comes to the crust of your low-sugar apple pie, you have the flexibility to choose between homemade or store-bought options. Whether you’re a seasoned baker or simply looking for convenience, both choices can result in a delightful diabetic-friendly dessert.
If you enjoy the process of making your own crust from scratch, you can experiment with different low-sugar recipes tailored to your taste. Using whole wheat flour or almond flour instead of refined white flour can add a nuttier flavor and increase the fiber content. Additionally, incorporating unsweetened applesauce or mashed bananas into the crust mixture can provide natural sweetness without the need for added sugar.
On the other hand, if time is of the essence or you prefer a ready-made crust, there are plenty of store-bought options available that cater to diabetic dietary needs. Look for brands that offer reduced-sugar or sugar-free crusts, which are usually made with alternative sweeteners like stevia or erythritol. These crusts can save you preparation time while still ensuring a delicious and diabetic-friendly apple pie.
Table: Pros and Cons of Homemade and Store-Bought Crust
| Homemade Crust | Store-Bought Crust | |
|---|---|---|
| Pros |
|
|
| Cons |
|
|
Ultimately, the choice between homemade or store-bought crust depends on your personal preferences and priorities. Whether you enjoy the therapeutic process of baking or simply need a quick and hassle-free option, both paths can lead to a delectable diabetic-friendly apple pie.
The Delicious Sugar-Free Filling
The secret to our delicious sugarless apple pie for diabetics lies in the delectable sugar-free filling. Made with a combination of sugar-free chocolate pudding, cornstarch, whole milk, egg yolks, vanilla, butter, and bittersweet chocolate, this filling is both indulgent and suitable for those managing their sugar intake.
To create the filling, start by combining the sugar-free chocolate pudding mix with cornstarch in a saucepan. Gradually whisk in the whole milk and cook over medium heat until the mixture thickens. In a separate bowl, whisk together the egg yolks and vanilla. Slowly add a small amount of the hot pudding mixture to the egg yolks, whisking constantly to temper them. Then, pour the tempered egg yolk mixture back into the saucepan with the remaining pudding mixture.
Continue cooking the filling over medium heat until it reaches a thick consistency. Remove the saucepan from the heat and stir in the butter and bittersweet chocolate until melted and well combined. The result is a luscious, sugar-free filling that perfectly complements the sweet-tartness of the apples in the pie.
| Ingredients: | Quantity: |
|---|---|
| Sugar-free chocolate pudding mix | 1 package |
| Cornstarch | 2 tablespoons |
| Whole milk | 2 cups |
| Egg yolks | 2 |
| Vanilla extract | 1 teaspoon |
| Butter | 2 tablespoons |
| Bittersweet chocolate, chopped | 2 ounces |
Once your sugar-free filling is ready, pour it into the prepared pie crust and smooth the top with a spatula. You can then refrigerate the pie for at least 4 hours, allowing it to set and become firm. This chilling time ensures that the filling holds together beautifully when you slice into the pie.
When you’re ready to serve, feel free to get creative with your toppings. Whipped cream, fresh raspberries or strawberries, hot fudge sauce, and chopped pecans or walnuts all make wonderful additions to this sugarless apple pie. The combination of flavors and textures will delight your taste buds, while the absence of added sugar keeps this treat suitable for individuals managing diabetes.
Perfect Toppings for Your Diabetic Apple Pie
Elevate the taste of your diabetic apple pie with a range of diabetic-friendly toppings that will satisfy your sweet tooth. Whether you prefer a classic whipped cream topping or want to experiment with unique flavors, there’s something for everyone to enjoy.
Whipped Cream and Fresh Berries
No apple pie is complete without a dollop of fluffy whipped cream. For a healthier twist, opt for sugar-free whipped cream or make your own using natural sweeteners. Top it off with a handful of fresh raspberries or strawberries for a burst of color and added freshness.
Hot Fudge Sauce and Chopped Nuts
Indulge in the rich flavor combination of hot fudge sauce and crunchy nuts. Use a sugar-free hot fudge sauce to keep it diabetic-friendly. Sprinkle some chopped pecans or walnuts on top for a delightful crunch that complements the smoothness of the apple pie filling.
Additional Toppings to Consider:
- Squirt whipped cream
- Chocolate syrup
- Caramel sauce
- Chopped pecans
- Chopped walnuts
Feel free to mix and match these toppings to create your own unique combination of flavors. The versatility of the diabetic apple pie allows for endless possibilities to suit your preferences. Experiment with different toppings and find your perfect combination to enhance the taste of this delicious dessert.
| Servings | Preparation Time |
|---|---|
| 10 | 4 hours and 10 minutes |
Chilling and Serving the Pie
Once you’ve prepared the no sugar added apple pie, it’s crucial to chill it in the fridge before serving to achieve the perfect texture and flavor. Refrigerating the pie allows the filling to set and the flavors to meld together, resulting in a deliciously satisfying dessert for those managing diabetes.
Before you pop the pie in the fridge, cover it tightly with plastic wrap or aluminum foil to prevent any odors or flavors from seeping into the pie. This will help maintain the integrity of the flavors and ensure that your pie tastes as good as it looks.
It is recommended to refrigerate the pie for at least 4 hours, although overnight chilling can intensify the flavors even further. When ready to serve, remove the pie from the fridge and let it sit at room temperature for a few minutes to slightly soften the crust for easier slicing. Then, using a sharp knife or pie server, cut the pie into individual slices and plate them accordingly.
Remember, a little goes a long way when it comes to enjoying the sweet flavors of this no sugar added apple pie. Each slice is packed with deliciousness and can be enjoyed as is, or paired with a variety of toppings that complement the flavors perfectly.
Table: Chilling and Serving Instructions
| Preparation Time | Chilling Time | Servings |
|---|---|---|
| 4 hours and 10 minutes | 4 hours (or overnight) | 10 |
Now that you know the importance of chilling and serving the no sugar added apple pie, you can confidently prepare this delectable dessert for yourself or your loved ones managing diabetes. Remember to savor every bite and enjoy the sweet taste without the guilt!
Beyond Apple Pie: Other Low-Sugar Dessert Options
If you’re in the mood for a variety of low-sugar desserts, we have several options that will satisfy any craving. Whether you’re a vegan, have dietary restrictions, or simply want to enjoy healthier treats, these recipes will surely delight your taste buds without compromising your health.
1. Vegan Desserts with No Sugar Added: Indulge in guilt-free desserts with our collection of vegan recipes that are free from refined sugar. Try our chocolate chip oat milk banana ice cream for a creamy and decadent treat. Or opt for the refreshing mango basil sorbet that combines the sweetness of mangoes with the aromatic flavor of basil.
2. Recipes for Various Low-Sugar Desserts: If you’re looking for a variety of low-sugar desserts, we’ve got you covered. Start your day with a delightful bowl of strawberries and cream overnight oats, packed with fiber and natural sweetness. Or whip up a creamy and tropical coconut-lime smoothie for a refreshing snack that satisfies your sweet tooth.
| Dessert | Preparation Time | Servings |
|---|---|---|
| No-Bake Oatmeal Peanut Butter Chocolate Chip Cookies | 20 minutes | 12 cookies |
| Slow Cooker Apple Pie Coconut Oatmeal | 6 hours (slow cooker) | 4 servings |
| Double-Chocolate Cherry Chunk Ice Cream | 10 minutes (+ freezing time) | 6 servings |
| Banana Tahini Chia Pudding | 5 minutes (+ chilling time) | 2 servings |
| No-Knead Wild Blueberry-Oregano Bread | 3 hours 30 minutes | 1 loaf |
| Chocolate-Covered Strawberry Smoothie Bowl | 10 minutes | 1 serving |
3. Exploring Different Interpretations of Cobbler: If you’re craving a traditional dessert with a twist, try our blackberry cobbler recipe. Savor the perfect blend of sweet blackberries, buttery crust, and golden topping. Serve it warm with a dollop of fresh sweetened cream, a scoop of vanilla ice cream, or a swirl of whipped cream for a truly indulgent experience.
With these low-sugar dessert options, you can enjoy delicious treats while keeping your sugar intake in check. So go ahead and satisfy your sweet tooth, guilt-free!
Exploring Different Interpretations of Cobbler
Take a culinary journey with our blackberry cobbler recipe, a delightful twist on the traditional cobbler dessert. Made with fresh blackberries and a buttery, golden crust, this recipe is sure to satisfy your sweet tooth. The combination of tart berries, sweetened cream, and a hint of vanilla creates a mouthwatering dessert that is perfect for any occasion.
To make this blackberry cobbler, you will need a few simple ingredients. Start by preheating your oven to 375°F (190°C) and gathering 4 cups of fresh blackberries. In a bowl, mix together 1 cup of sugar and 1 cup of self-rising flour. Cut in ½ cup of cold butter until the mixture resembles coarse crumbs. Then, spread the blackberries evenly in a 9×13-inch baking dish and sprinkle the sugar and flour mixture over the top.
| Ingredients: | Instructions: |
|---|---|
| 4 cups fresh blackberries | Preheat the oven to 375°F (190°C). |
| 1 cup sugar | Mix together 1 cup of sugar and 1 cup of self-rising flour in a bowl. |
| 1 cup self-rising flour | Cut in ½ cup of cold butter until the mixture resembles coarse crumbs. |
| ½ cup cold butter | Spread the blackberries evenly in a 9×13-inch baking dish and sprinkle the sugar and flour mixture over the top. |
Bake the cobbler in the preheated oven for 45-50 minutes, or until the crust is golden and the blackberries are bubbling. Allow the cobbler to cool for a few minutes before serving. For an extra special touch, top each serving with a dollop of sweetened cream, a scoop of vanilla ice cream, or a swirl of whipped cream.
Whether you enjoy it on its own or pair it with your favorite ice cream, our blackberry cobbler is a delicious treat that is sure to impress. So why not give it a try and experience the mouthwatering flavors of this classic dessert with a twist?
Conclusion
Managing diabetes doesn’t mean giving up on delicious desserts. With our no sugar diabetic apple pie recipe, you can enjoy a sweet and satisfying treat without compromising your health.
Our recipe ensures that you can indulge in the classic flavors of apple pie, while keeping your blood sugar levels in check. The crust options are flexible, allowing you to choose between a homemade crust or a store-bought one. You can even experiment with an Oreo or graham cracker crust for a unique twist.
The filling of our no sugar diabetic apple pie is made with sugar-free chocolate pudding, cornstarch, whole milk, egg yolks, vanilla, butter, and bittersweet chocolate. The use of cornstarch and egg yolks ensures a thick and creamy consistency. Once baked, you can top the pie with whipped cream, fresh berries, hot fudge sauce, or chopped nuts for added flavor and texture.
After preparing the pie, make sure to allow it to chill in the fridge for at least 4 hours to set properly. This step is essential for achieving the perfect slice. Our recipe yields 10 servings, making it ideal for sharing with family and friends.
For those looking for additional low-sugar dessert options, we have a range of delicious recipes to explore. From vegan desserts with no added sugar to refreshing smoothies, overnight oats, and cookies, there’s something to satisfy every sweet tooth. You can also try different interpretations of cobbler, such as our tempting blackberry cobbler recipe.
So why wait? Treat yourself to a guilt-free dessert experience with our no sugar diabetic apple pie recipe. Indulge in the comforting flavors of apple pie while keeping your health in mind. Remember, managing diabetes doesn’t mean you have to miss out on the joy of sweet treats.
FAQ
Q: Is this apple pie recipe suitable for diabetics?
A: Yes, this apple pie recipe is specifically designed for diabetics, as it contains no sugar and uses sugar-free ingredients.
Q: Can I use a store-bought crust for this pie?
A: Absolutely! You have the option to use a homemade pie crust or a store-bought crust, whichever is more convenient for you.
Q: What are the key ingredients used in the filling?
A: The filling of this apple pie is made with sugar-free chocolate pudding, cornstarch, whole milk, egg yolks, vanilla, butter, and bittersweet chocolate.
Q: How can I top the diabetic apple pie?
A: You can top the pie with whipped cream, fresh raspberries or strawberries, hot fudge sauce, chopped pecans or walnuts, according to your preference.
Q: How long does the pie need to be chilled before serving?
A: The pie needs to be chilled in the fridge for 4 hours before slicing and serving.
Q: Are there alternative dessert options with less sugar?
A: Yes, there are various dessert options for those who want a sweet treat with less sugar. Some examples include vegan desserts with no sugar added, chocolate chip oat milk banana ice cream, mango basil sorbet, and more.
Q: Can you provide a recipe for blackberry cobbler?
A: Yes, we have a blackberry cobbler recipe that uses self-rising flour, sugar, butter, and blackberries. It is baked in the oven until golden and bubbly and can be served with fresh sweetened cream, vanilla ice cream, or whipped cream.
Q: How many servings does this apple pie recipe yield?
A: This apple pie recipe yields 10 servings, making it perfect for sharing with family and friends.